Thursday, December 22, 2011

Eggnog Latte

One of my favorite things about holidays is there is usually a flavor you can associate with it.  Thanksgiving has turkey and pumpkin pie. Valentine's Day has chocolate (duh).  Summer holidays have barbecue.  Christmas to me is eggnog.  So when the calendar changes to December, I start looking for eggnog to hit the store shelves.

One of my favorite ways to enjoy eggnog is in a latte.  The mix of flavors just screams Christmastime.  The espresso helps get me through those long days of running around from store to store.  You could stop at Starbuck's for one of these, but that would cost you somewhere between an arm and a leg.  This is much cheaper and just as good.


Eggnog Latte

2 oz espresso
1/4 cup milk
1/2 cup eggnog
Fresh ground nutmeg (optional)

Brew espresso according to manufacturer's instructions.  Pour into mug.


In steamer pot or measuring cup, combine eggnog and milk.  Steam eggnog mixture until hot and frothy (time will depend on your espresso maker).  Pour eggnog mixture into espresso, using spoon to hold back froth until very end.  Sprinkle lightly with nutmeg, if desired.  Serve immediately.


Tuesday, December 20, 2011

Dutch Brown Bread


This is the second in a series of loaves of bread I have made in my Black and Decker All-In-One Deluxe Bread Maker.  The first loaf was my Rich Egg Bread.  This loaf is a whole wheat bread and is chewier than the first loaf of the series.  Due to the amount of whole wheat flour in the dough, this bread does not rise as high, so the loaf is comes out denser.

This bread is a European style bread flavored with cinnamon and molasses.  The cinnamon does not over power the bread, so this is not a sweet bread as some might think.  The flavor of this bread makes it perfect for a hearty sandwich, such as ham and Swiss cheese w/mustard.


Dutch Brown Bread

1 cup warm water (80-85 degrees F)
1 egg
3 Tbsp molasses
1-1/2 Tbsp butter, softened
1 tsp cinnamon
1 tsp salt
1-3/4 cups whole wheat flour
1 cup bread flour
2-1/4 tsp active dry yeast

Place ingredients in bread maker in order recommended by the manufacturer (I have a Black and Decker All-In-One Deluxe Bread Maker, so the list above is the right order for me).  Select wheat or grain cycle and desired crust (I went with normal instead of dark).  Turn on bread maker and let it run through its cycle.


After the bread has been kneading for about 5 minutes, check the dough.  It should be a smooth round ball. If dough appears too sticky, add additional flour, one tablespoon at a time until the dough reaches the proper consistency.  If dough is too dry, add additional water, one tablespoon at a time until the dough reaches the proper consistency.


At end of cycle, remove bread promptly and cool on wire rack.  If bread is left in appliance too long, the top can fall and the bottom of the loaf will get soggy from the trapped steam.  Let cool at least 20 minutes on a wire rack before slicing.


Sunday, December 18, 2011

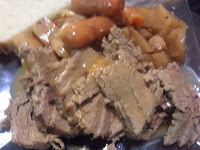
Beef Pot Roast

On a cold and blustery day in Nebraska, there is nothing better that coming home to a dinner that is almost ready.  Especially when there are still places to go and dinner needs to be on the table as quickly as possible.  Beef pot roast is the perfect meal for nights like this.  Once the beef is cooked, the finishing touches take only about 10 minutes and the meal is ready to go.  Just add a hearty loaf of bread to soak up the gravy and you have a meal that will satisfy the biggest hunger.

Beef roasts are perfectly suited for the crockpot.  The slow, moist cooking method ensures the beef will become very tender.  Even the toughest cuts of beef can be used for this meal.  I prefer a chuck roast, but any roast will work.  The key to tenderizing the beef is to cook it long and low.  I usually cook mine on the low setting for at least 12 hours (sometimes as long as 16).  This process breaks down the connective tissue in the meat, resulting in a very tender roast that will fall apart due to its tenderness.

Root vegetables are ideal for this dish because they can stand up to the long cooking times.  Potatoes and carrots, the usual accompaniments for pot roast, cook in the same liquid as the beef, allowing them to absorb the flavors of the meat.  On this instance, I added some parsnips that were in my refrigerator.  At the end of 12 hours of cooking time, the vegetables were very tender but still held their shape.


Beef Pot Roast

3-4 lb beef roast
2 Tbsp vegetable oil
5 potatoes, peeled and cut into 3/4" cubes
1 lb baby carrots
4 parsnips, peeled and cut into 1/2" pieces
1 envelope powdered onion soup mix
1 cup water
2 Tbsp butter
2 Tbsp flour
Salt and pepper. to taste

Spray inside of crockpot with nonstick cooking spray.  Toss potatoes, carrots, and parsnips and place in bottom of crockpot.  Heat oil over medium-high heat in large skillet.  Brown roast on all sides.  Transfer roast to crockpot.  Sprinkle soup mix over top of roast and pour water over top.  Place lid on crockpot and set on high for 30 minutes.  Reduce heat to low and cook for at least 12 hours (no more than 16 or the vegetables will be very mushy).


When beef is finished cooking, remove roast and vegetables from cooking liquid.  Skim as much fat from cooking liquid as possible and discard.  If necessary, add enough beef broth to make 1-1/2 cups liquid.  In saucepan, melt butter over medium heat.  Add flour and cook 1 minute.  Slowly whisk in cooking liquid.  Bring to a boil and cook until thickened.  Season to taste with salt and pepper.  Slice roast and serve with vegetables and gravy.


Friday, December 16, 2011

Sauteed Asparagus

Asparagus has become my wife's favorite vegetable.  She likes it steamed, sauteed, and roasted.  About the only way she doesn't like it is boiled to a mush, but who does?  So this recipe is for her.

This recipe is very simple and be prepared in just a matter of minutes.  The asparagus is steamed lightly, then sauteed in olive oil with garlic and chili flakes.  The resulting dish pairs well with almost any regional cuisine (I've served it with Italian, French, and Asian dishes).  As for the asparagus itself, make sure to select smaller shoots as they are more tender and have a less woody flavor.


Sauteed Asparagus

1 lb asparagus
1/4 cup chicken stock
2 Tbsp olive oil
2 cloves garlic, minced
1/4 tsp red pepper flakes
Kosher salt

Wash asparagus and trim away woody base ends.  Place asparagus and chicken stock in large skillet.  Bring to boil over medium high heat and cook until pan is almost dry.


Add oil, garlic, and pepper flakes to skillet.  Saute for 3-4 minutes, or until garlic is cooked and asparagus is lightly browned.  Season with salt to taste.  Serve immediately.


Wednesday, December 14, 2011

Chicken Piccata

Chicken is definitely king in our house.  My freezer usually has at least a half dozen packages of chicken in it at all times.  Boneless, skinless chicken breast is very easy to work with and cooks up tender if cooked correctly.  In this case, the chicken is browned to start, then simmered in a flavorful sauce to finish the cooking and ensure tenderness.

Chicken piccata is a classic Italian dish.  Piccata is Italian for "to be pounded flat".  Here the chicken is lightly pounded out, dredged, and sauteed.  It is then finished in a white wine and lemon sauce that adds a lot of flavor.  I added mushrooms to this dish a few years ago as a way to increase the visual appeal of the dish.  They soak up the flavor of the sauce perfectly and complement the chicken beautifully.  A little sprinkle of Parmesan cheese over this dish finishes it.


Chicken Piccata

2 boneless, skinless chicken breasts (about 20 oz total)
3 Tbsp flour
4 Tbsp olive oil, divided
8 oz mushrooms, sliced
2 cloves garlic, minced
1/3 cup white wine
Juice of two lemons
3/4 cup chicken stock
2 Tbsp butter
2 Tbsp capers (optional)
Parmesan cheese

Cut each chicken breast in half and pound out slightly.  Place flour in a zip top bag with chicken breasts and shake to coat.  Heat two tablespoons olive oil in a large skillet over medium high heat.  Add chicken and brown on both sides (about 4 minutes on each side).  Remove from skillet and cover with aluminum foil to keep warm.


In same skillet, heat remaining two tablespoons olive oil.  Saute mushrooms in olive oil until lightly browned (about 4 minutes).  Add garlic and cook another 30 seconds.


Remove pan from heat and pour in white wine.  Let reduce slightly, then add lemon juice and chicken stock. Return chicken to pan and place over medium heat.  Simmer chicken five minutes in sauce.  Remove chicken to plate and stir butter into sauce.  Add capers just before serving (if using).  Serve chicken and sauce over pasta if desired.  Sprinkle with Parmesan cheese.


Monday, December 12, 2011

Roasted Root Vegetables

My wife loves vegetables.  If she had her way, we would be vegetarians.  Not me.  But for her, I am always looking for vegetable dishes she would enjoy.  She really likes roasted vegetables, so I decided to throw together as many root vegetables as I could find and roast them all together.  The resulting dish is now a staple in our house during the winter months.

The key to this recipe is making sure you cut the different vegetables to approximately the same size.  With different sizes, some ingredients wind up cooked just right while others are either too hard or too mushy.  I usually cut the pieces approximately the size of a baby carrot or just a little bit smaller.  This way, every thing is done at the same time and all pieces are bite-sized.

For those picky people out there, if you do not like any of the vegetables listed, leave them out and increase the amount of the other vegetables, or substitute with an equal amount of potato.  Remember, eat what you like.


Roasted Root Vegetables

1 lb baby carrots
5 oz pearl onions, peeled
4 parsnips, peeled and cut into 1 inch pieces
2 turnips, peeled and cut into 1 inch cubes
2 beets, peeled and cut into 1 inch cubes
1 sweet potato, peeled and cut into 1 inch cubes
2 cloves garlic, minced
4 Tbsp olive oil
Kosher salt and black pepper

Preheat oven to 400 degrees F.  Toss all ingredients together in a large bowl.  Season to taste with salt and pepper.  Pour into 11x17 inch baking sheet, or divide between two baking dishes (try to get everything in a single layer).


Roast at 400 degrees for 50-55 minutes, stirring every 15 minutes.  Check seasoning and add additional salt and pepper if necessary.  Serve immediately.


Saturday, December 10, 2011

Rich Egg Bread


Recently I found a bread maker for sale at a garage sale.  It was in very good shape and was only $20.  Can't beat that.  The problem was, there was not instructions.  After combing the internet, I finally found an electronic copy of the owner's manual which told me the correct order to place the ingredients into the bread maker.  I've baked a few loaves of bread in it now, and I will be sharing some of my favorites over the next few months.

The ingredients you use to make bread are very important.  In the United States, using bread flour instead of all-purpose flour will result in a loaf with a better texture.  I usually bring cold ingredients, such as milk and eggs, to room temperature before using them (I find 30-35 seconds in the microwave is about right for a cup of milk).  Not only do you want to use quality ingredients, but make sure you measure them accurately.  An extra tablespoon of water or flour could throw off the texture of the bread.

Placing the ingredients in the appliance in the wrong order is a sure way to fail when it comes to making bread.  For example, if the salt comes in contact with the yeast to early, the yeast will die and the bread will not rise.  My bread maker has me place the liquid ingredients in first, followed by any salt and flavorings, then the flour, and finally the yeast sprinkled over the top.  If you try this recipe, make sure to follow the recommendations for your bread maker.  You can also make the bread by hand if you wish.


Rich Egg Bread

1 cup milk
1 egg
1-1/2 Tbsp butter, softened
2 Tbsp sugar
1-1/2 tsp salt
3-1/4 cups bread flour
2 tsp active dry yeast

Place ingredients in bread maker in order recommended by the manufacturer (I have a Black and Decker All-In-One Deluxe Bread Maker, so the list above is the right order for me).  Select basic cycle and desired crust (I went with normal instead of dark).  Turn on bread maker and let it run through its cycle.


After the bread has been kneading for about 5 minutes, check the dough.  It should be a smooth round ball. If dough appears too sticky, add additional flour, one tablespoon at a time until the dough reaches the proper consistency.  If dough is too dry, add additional water, one tablespoon at a time until the dough reaches the proper consistency.


At end of cycle, remove bread promptly and cool on wire rack.  If bread is left in appliance too long, the top can fall and the bottom of the loaf will get soggy from the trapped steam.  Let cool at least 20 minutes on a wire rack before slicing.


Wednesday, December 7, 2011

Twice Grilled BBQ Burritos

This recipe started out as a way to use up some leftover chicken fajita meat.  I decided to wrap it in a tortilla, baste it with barbecue sauce, and throw it back on the grill.  The result was better than the original fajitas, and an instant classic was born.  Since then, I have made this dish many times for many people, and only one person has not liked it (you know who you are, Mom).

During the summer, this can be prepared on the grill outside, but with nearly six inches of snow on the ground, the George Foreman grill just sounded a lot warmer.  The chicken in this recipe can be cooked the day before and refrigerated.  Just make sure to heat it back up prior to assembling the burritos.  As far as the barbecue sauce goes, use what you like.  I usually use Sweet Baby Ray's with a little chipotle added.


Twice Grilled BBQ Burritos

2 lbs boneless skinless chicken breast
3 oz lime juice
1/4 cup + 2 Tbsp vegetable oil
1 tsp cumin
1/2 tsp oregano
1 tsp hot sauce
1/2 tsp salt
2 green bell peppers, seeded and sliced into 1/4" strips
1 large onion, peeled and sliced
6 large tortillas
1-1/2 cups cheddar cheese
2 cups barbecue sauce

Place chicken in glass dish or plastic bag.  In small bowl, stir together lime juice, 1/4 cup vegetable oil, cumin, oregano, hot sauce, and salt.  Pour over chicken and marinade in refrigerator at least two hours (overnight is great).  Grill chicken over medium heat until temperature reads 170 degrees on thermometer.  Remove from grill and let cool until able to handle.


In large skillet over medium high heat, saute onion and bell pepper in remaining 2 Tbsp oil.  Slice chicken and add to onion mixture.


To assemble, divide chicken mixture evenly between tortillas.  Top each tortilla with 1/4 cup cheese.  Fold ends in, then roll up.


Grill burritos over medium heat, basting with barbecue sauce, about 10 minutes, or until heated through.  Be careful not to burn sauce.  Serve with sour cream, if desired.

Sunday, December 4, 2011

Blueberry Pancakes

Pancakes are very popular in my house, and we usually have them at least once a week for breakfast.  My kids and I love blueberries in our pancakes (my wife prefers her plain).  During the summer, I get fresh blueberries from the farmer's market and use them in these pancakes, but with the year round availability of frozen blueberries, we can have them when ever we want.

The batter for these pancakes is a standard batter, and the blueberries are added after the batter has been poured onto the cooking surface.  This helps to keep the berries whole and prevents the batter from turning an unappealing blueish-purple color.  As far as cooking the pancakes goes, you can use a non-stick skillet on the stove, but I prefer to use an electric griddle.  The flat surface and even heating help ensure the pancakes come out evenly browned, and not having to deal with the sides of the pan makes flipping them over very easy.

I usually get 12-16 pancakes out of this recipe.  Any leftovers I individually freeze on parchment paper and then place in freezer bags for storage.  They can then be reheated in either the microwave or the toaster.


Blueberry Pancakes

2 cups all-purpose flour
2 Tbsp sugar
2 tsp baking powder
1/2 tsp baking soda
1/2 tsp salt
2 eggs, beaten
2 cups buttermilk
1/4 cup vegetable oil
Non-stick cooking spray
Fresh or frozen blueberries
Butter and syrup, for serving

In medium bowl, combine flour sugar, baking powder, baking soda, and salt.  In a separate container, stir together eggs, buttermilk, and oil.  Add liquid to dry ingredients all at once and stir just until moistened (if there are a few lumps, don't worry about it, they will cook out).


Heat electric griddle to medium-high.  Spray surface with non-stick cooking spray and ladle 1/4 batter per pancake onto griddle.  Quickly sprinkle with blueberries and cook until edges begin to dry and bottoms are golden brown (about 2-3 minutes).  Carefully flip pancakes with spatula and finish cooking on the other side.  Remove from griddle and serve immediately with butter and syrup.


Tuesday, November 29, 2011

Quesadillas

Many people's only experience with quesadillas has come in the drive-thru lane at their local Taco Bell.  While these "quesadillas" are technically edible, they do not compare with the homestyle versions I enjoyed during my 5 year stay in Texas.  Quesadillas are essentially the grilled cheese of Mexican cooking, and the simplest quesadilla is made using just cheese and a tortilla.

However, just like a grilled cheese, you can also add meats and veggies to make the flavor suit your tastes.  Just about anything can be used as a filling.  I like to use leftover fajita meat, along with the onions and peppers, for a quick lunch the next day.  Another of my favorites is using leftover barbecue brisket.  You can even make a vegetarian version with sauteed mushrooms, black beans, and spinach for the filling.  The possibilities are really up to you.

The key to a good quesadilla is the pan.  Cast iron is probably the best choice, but any heavy bottomed pan that distributes heat evenly will work.  Just be sure not to turn the heat up too high, or you will burn the tortilla before the cheese melts.  Also, if you kept the heat low, the cheese should melt enough to hold the quesadilla together when flipping it over.


Quesadillas

4 burrito size tortillas
2 cups shredded cheddar cheese
1-2 cups filling (your choice)
3 Tbsp butter

Sprinkle 1/4 cup cheese on 1/2 of each tortilla.  Divide filling evenly over cheese.  Sprinkle filling with remaining cheese.  Fold tortilla over top of cheese.


In large skillet over medium low heat, melt 1 Tbsp butter.  Add two quesadillas to pan and cook over medium low heat until bottom is browned and cheese is melted, about 3-4 minutes (remember to keep the heat down so you don't burn the tortilla).  Add 1/2 Tbsp butter to pan and carefully flip quesadillas over.  Cook another 3-4 minutes, or until second side is golden brown.  Remove from pan and let rest two minutes before cutting.  Repeat with remaining two quesadillas.  If desired, serve with sour cream and/or guacamole.


Sunday, November 27, 2011

Creamy Chicken Enchilada Soup

My sister posted a soup recipe a couple weeks ago on her blog for Creamy Chicken Enchilada Soup (you can find her original post here).  I decided to try it (with a couple modifications) on my family.  This soup seemed like it would be good for us because we like thicker soups, rather than ones with just a broth base.  This soup came out nice and thick and had a really good flavor.  I decreased the amount of milk from the original dish, but increased the amount of broth to keep the overall liquid the same.  I also added a finely minced chipotle pepper for a bit of smoky flavor and heat.


Creamy Chicken Enchilada Soup

1 large onion, diced
1 green pepper, seeded and diced
1 can black beans, rinsed and drained
1 can corn, drained
1 chipotle pepper, seeded and minced fine
1 can Rotel tomatoes
1-1/2 lbs chicken breast or tenderloins
1-1/2 cups chicken broth
1-1/2 cups milk
3 Tbsp butter
3 Tbsp flour
1 can enchilada sauce
Salt and pepper to taste

In medium saucepan over medium heat, melt butter.  Stir in flour and cook for 2 minutes.  Add  1 cup chicken broth and stir until no lumps remain.  Pour in milk and heat until thickened.  Remove from heat and stir in enchilada sauce.  Set aside.


Place onion, green pepper, beans, corn, chipotle pepper, and tomatoes in crockpot and mix together.  Lay chicken over top of vegetables.  Pour remaining 1/2 cup chicken broth over top of chicken.  Pour sauce over chicken.  Cook on low for 6-8 hours or high for 3-4.  Remove chicken from soup and shred.  Return chicken to soup and season soup to taste with salt and pepper.  Garnish with cheese, sour cream, and cilantro.


Saturday, November 26, 2011

Baked Acorn Squash

Acorn squash is one of those cheap vegetables from the produce department that you rarely see people purchase.  When I used to work in a produce department, I only had to order this from our supplier on rare occasions.  That's too bad, because this squash is loaded with vitamins A, B6, C, and E, as well as being a good source of potassium and magnesium.  Additionally, it keeps very well, so you can purchase it today and not not cook it til next week if you desire.  On top of all that, it is a truly delicious side that just screams fall.


Baked Acorn Squash

2 acorn squash
4 Tbsp butter
4 Tbsp brown sugar
Cinnamon

Preheat oven to 375 degrees F.  Cut squash in half vertically.  Using spoon, scoop out seeds and discard.  Place squash, cut side down in a 9x13-inch baking dish.  Add 1/2 cup water to pan and bake in oven for 30 minutes.


Remove pan from oven and turn squash over.  Place 1 Tbsp butter and 1 Tbsp brown sugar in the cavity of each squash half.  Sprinkle with cinnamon.  Return to oven for 30 more minutes, or until squash is very tender.  To eat, scrape squash from shell with fork and mix with butter mixture.


Tuesday, November 22, 2011

Cabbage and Apples

During the summer, any cabbage that crosses my cutting board usually finds its way into a cole slaw.  However, in the fall and winter I prefer the taste of cooked cabbage.  In this dish, I combined the cabbage with a fall classic, the apple, to create a dish that is sweet enough that even my picky daughter not only tried, but ate every single bite of.  Additionally, this dish adds a bold color to the plate, making it appealing visually as well.


Cabbage and Apples

2 Tbsp unsalted butter
1 small head red cabbage
1 large Granny Smith apple, cored and peeled
1/2 cup apple juice
1 tsp kosher salt

Cut apple into 1/2-inch cubes.  In large skillet, melt butter over medium heat.  Add apple and cook 4-5 minutes, stirring often, until apple is lightly browned.  While apple is cooking, cut cabbage in half and remove core.  Slice cabbage into thin ribbons and separate.  Add cabbage to skillet and toss.


Add apple juice and sprinkle salt over top of cabbage.  Cover with lid and cook until cabbage is tender but not mushy (about 10-15 minutes).  Remove from heat and serve immediately.


This recipe is shared at:
Kelly The Kitchen Kop

Sunday, November 13, 2011

Breakfast Burritos

Breakfast in my house is usually eaten on the run.  Whether off to school or work, we usually grab breakfast to go.  These burritos are great because they make a filling breakfast in portable form, and they freeze well too.  These can be made and frozen on the weekend, then heated up throughout the week by simply popping them in the microwave for a couple minutes.  To keep them warm on the way to work or school, I usually wrap them in aluminum foil after microwaving.


This recipe makes 4 large burritos, but can easily be doubled or tripled to make larger quantities.


Breakfast Burritos

1 link chorizo sausage, casing removed
2-1/2 cups frozen potatoes w/onions and peppers
1/2 cup ham, diced
4 eggs
4 burrito size tortillas
1 cup shredded cheddar cheese
Salsa
Jalapenos (if desired)

In large non-stick skillet, crumble and brown sausage over medium high heat.  Remove sausage from pan and set aside.  To drippings in pan, add potatoes and ham.  Cook and stir over medium heat  until potatoes are soft and lightly browned (if food starts to stick, add a little olive oil to pan).  Add sausage back to pan.


In small bowl, beat eggs.  Push potato and meat mixture to sides of pan and pour eggs into center of pan.  Let eggs cook for 1 minute, then scramble eggs into meat and potato mixture.  Continue cooking until eggs are set, about 2 minutes.  Remove from heat.  To assemble, place 1/4 of egg mixture down center of tortilla.  Top with 1/4 cup cheese.  If desired, add salsa and jalapenos.  Fold ends of tortilla in, then roll up.


Saturday, November 12, 2011

Pressed Chicken Pesto Sandwiches

Sandwiches are like personalities. Everyone has their own and there are literally thousands of variations.  You can simply place a slice of bologna between two slices of bread, or you get fancy by adding all sorts of exotic ingredients.  The choice is totally yours.  This sandwich combines some of my favorite ingredients.  I love the flavor of pesto, and the rest of the ingredients pair very well with it.  The sandwich is pressed and grilled, which makes the outside crunchy and the inside hot and tasty.  Just the way I like it.  The nice thing is, if you don't like it, you can change the ingredients to suit your own tastes.  Why? Cause it's your sandwich.


Chicken Pesto Sandwiches

6 4-5 inch sub rolls
6 Tbsp pesto
12 oz cooked chicken breast, chopped
2 oz olives, sliced
1-1/2 cups fresh spinach
1 cup shredded mozzarella cheese
Olive oil


Split sub rolls in half horizontally.  Spread 1 Tbsp of pesto on each bottom half of bread.  Top pesto with 2 oz of chicken per sandwich.  Divide olives evenly over chicken.  Sprinkle cheese evenly over olives.  Add 1/4 cup spinach to each sandwich and cover with top half of bread.


Brush top of sandwiches with olive oil.  Drizzle olive oil on bottom plate of countertop grill or panini press.Place sandwiches on grill and press down firmly (I usually set my really heavy skillet on top of the grill to press it down).  Grill 4-5 minutes, or until outside of sandwich is crunchy and cheese is melted.  Remove from grill and cool 1 minute before cutting.


Related Posts Plugin for WordPress, Blogger...