My wife loves vegetables. If she had her way, we would be vegetarians. Not me. But for her, I am always looking for vegetable dishes she would enjoy. She really likes roasted vegetables, so I decided to throw together as many root vegetables as I could find and roast them all together. The resulting dish is now a staple in our house during the winter months.
The key to this recipe is making sure you cut the different vegetables to approximately the same size. With different sizes, some ingredients wind up cooked just right while others are either too hard or too mushy. I usually cut the pieces approximately the size of a baby carrot or just a little bit smaller. This way, every thing is done at the same time and all pieces are bite-sized.
For those picky people out there, if you do not like any of the vegetables listed, leave them out and increase the amount of the other vegetables, or substitute with an equal amount of potato. Remember, eat what you like.
Roasted Root Vegetables
1 lb baby carrots
5 oz pearl onions, peeled
4 parsnips, peeled and cut into 1 inch pieces
2 turnips, peeled and cut into 1 inch cubes
2 beets, peeled and cut into 1 inch cubes
1 sweet potato, peeled and cut into 1 inch cubes
2 cloves garlic, minced
4 Tbsp olive oil
Kosher salt and black pepper
Preheat oven to 400 degrees F. Toss all ingredients together in a large bowl. Season to taste with salt and pepper. Pour into 11x17 inch baking sheet, or divide between two baking dishes (try to get everything in a single layer).
Roast at 400 degrees for 50-55 minutes, stirring every 15 minutes. Check seasoning and add additional salt and pepper if necessary. Serve immediately.
Monday, December 12, 2011
Saturday, December 10, 2011
Rich Egg Bread
Recently I found a bread maker for sale at a garage sale. It was in very good shape and was only $20. Can't beat that. The problem was, there was not instructions. After combing the internet, I finally found an electronic copy of the owner's manual which told me the correct order to place the ingredients into the bread maker. I've baked a few loaves of bread in it now, and I will be sharing some of my favorites over the next few months.
The ingredients you use to make bread are very important. In the United States, using bread flour instead of all-purpose flour will result in a loaf with a better texture. I usually bring cold ingredients, such as milk and eggs, to room temperature before using them (I find 30-35 seconds in the microwave is about right for a cup of milk). Not only do you want to use quality ingredients, but make sure you measure them accurately. An extra tablespoon of water or flour could throw off the texture of the bread.
Placing the ingredients in the appliance in the wrong order is a sure way to fail when it comes to making bread. For example, if the salt comes in contact with the yeast to early, the yeast will die and the bread will not rise. My bread maker has me place the liquid ingredients in first, followed by any salt and flavorings, then the flour, and finally the yeast sprinkled over the top. If you try this recipe, make sure to follow the recommendations for your bread maker. You can also make the bread by hand if you wish.
Rich Egg Bread
1 cup milk
1 egg
1-1/2 Tbsp butter, softened
2 Tbsp sugar
1-1/2 tsp salt
3-1/4 cups bread flour
2 tsp active dry yeast
Place ingredients in bread maker in order recommended by the manufacturer (I have a Black and Decker All-In-One Deluxe Bread Maker, so the list above is the right order for me). Select basic cycle and desired crust (I went with normal instead of dark). Turn on bread maker and let it run through its cycle.
After the bread has been kneading for about 5 minutes, check the dough. It should be a smooth round ball. If dough appears too sticky, add additional flour, one tablespoon at a time until the dough reaches the proper consistency. If dough is too dry, add additional water, one tablespoon at a time until the dough reaches the proper consistency.
At end of cycle, remove bread promptly and cool on wire rack. If bread is left in appliance too long, the top can fall and the bottom of the loaf will get soggy from the trapped steam. Let cool at least 20 minutes on a wire rack before slicing.
Labels:
Breads
Wednesday, December 7, 2011
Twice Grilled BBQ Burritos
This recipe started out as a way to use up some leftover chicken fajita meat. I decided to wrap it in a tortilla, baste it with barbecue sauce, and throw it back on the grill. The result was better than the original fajitas, and an instant classic was born. Since then, I have made this dish many times for many people, and only one person has not liked it (you know who you are, Mom).
During the summer, this can be prepared on the grill outside, but with nearly six inches of snow on the ground, the George Foreman grill just sounded a lot warmer. The chicken in this recipe can be cooked the day before and refrigerated. Just make sure to heat it back up prior to assembling the burritos. As far as the barbecue sauce goes, use what you like. I usually use Sweet Baby Ray's with a little chipotle added.
Twice Grilled BBQ Burritos
2 lbs boneless skinless chicken breast
3 oz lime juice
1/4 cup + 2 Tbsp vegetable oil
1 tsp cumin
1/2 tsp oregano
1 tsp hot sauce
1/2 tsp salt
2 green bell peppers, seeded and sliced into 1/4" strips
1 large onion, peeled and sliced
6 large tortillas
1-1/2 cups cheddar cheese
2 cups barbecue sauce
Place chicken in glass dish or plastic bag. In small bowl, stir together lime juice, 1/4 cup vegetable oil, cumin, oregano, hot sauce, and salt. Pour over chicken and marinade in refrigerator at least two hours (overnight is great). Grill chicken over medium heat until temperature reads 170 degrees on thermometer. Remove from grill and let cool until able to handle.
In large skillet over medium high heat, saute onion and bell pepper in remaining 2 Tbsp oil. Slice chicken and add to onion mixture.
To assemble, divide chicken mixture evenly between tortillas. Top each tortilla with 1/4 cup cheese. Fold ends in, then roll up.
Grill burritos over medium heat, basting with barbecue sauce, about 10 minutes, or until heated through. Be careful not to burn sauce. Serve with sour cream, if desired.
Labels:
Grilling
Sunday, December 4, 2011
Blueberry Pancakes
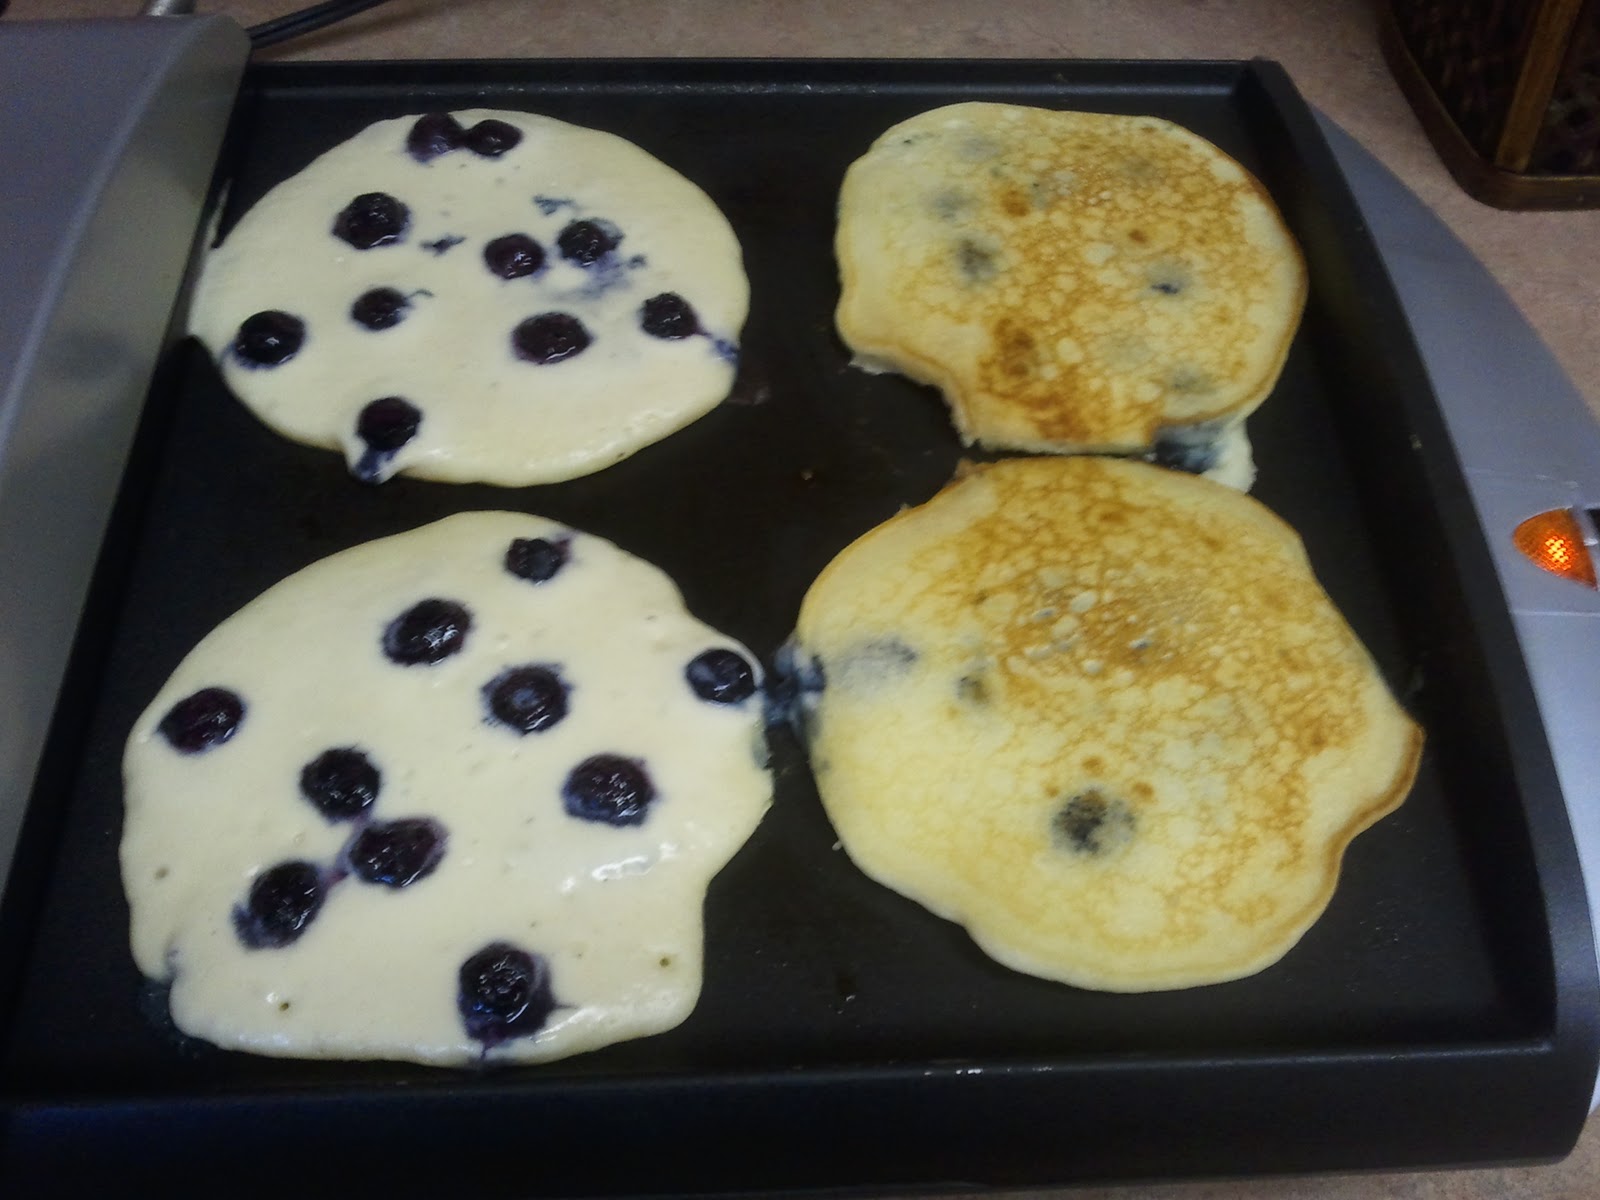
Pancakes are very popular in my house, and we usually have them at least once a week for breakfast. My kids and I love blueberries in our pancakes (my wife prefers her plain). During the summer, I get fresh blueberries from the farmer's market and use them in these pancakes, but with the year round availability of frozen blueberries, we can have them when ever we want.
The batter for these pancakes is a standard batter, and the blueberries are added after the batter has been poured onto the cooking surface. This helps to keep the berries whole and prevents the batter from turning an unappealing blueish-purple color. As far as cooking the pancakes goes, you can use a non-stick skillet on the stove, but I prefer to use an electric griddle. The flat surface and even heating help ensure the pancakes come out evenly browned, and not having to deal with the sides of the pan makes flipping them over very easy.
I usually get 12-16 pancakes out of this recipe. Any leftovers I individually freeze on parchment paper and then place in freezer bags for storage. They can then be reheated in either the microwave or the toaster.
Blueberry Pancakes
2 cups all-purpose flour
2 Tbsp sugar
2 tsp baking powder
1/2 tsp baking soda
1/2 tsp salt
2 eggs, beaten
2 cups buttermilk
1/4 cup vegetable oil
Non-stick cooking spray
Fresh or frozen blueberries
Butter and syrup, for serving
In medium bowl, combine flour sugar, baking powder, baking soda, and salt. In a separate container, stir together eggs, buttermilk, and oil. Add liquid to dry ingredients all at once and stir just until moistened (if there are a few lumps, don't worry about it, they will cook out).
Heat electric griddle to medium-high. Spray surface with non-stick cooking spray and ladle 1/4 batter per pancake onto griddle. Quickly sprinkle with blueberries and cook until edges begin to dry and bottoms are golden brown (about 2-3 minutes). Carefully flip pancakes with spatula and finish cooking on the other side. Remove from griddle and serve immediately with butter and syrup.
Labels:
30 Minutes or Less,
Breads
Subscribe to:
Posts (Atom)